Living in a small apartment comes with undeniable advantages: lower costs, easier maintenance, and a cozy atmosphere. However, open layouts can quickly become overwhelming when your living room turns into your bedroom, your dining area doubles as your workspace, and privacy becomes nearly impossible.
If you’re renting, the situation becomes even more complicated. Most leases prohibit drilling, installing permanent partitions, or making structural changes. That’s where a lightweight wood room divider becomes one of the smartest solutions available.
This guide will walk you through everything you need to know — from understanding the different types of dividers to choosing the right one, placing it strategically, styling it professionally, and maintaining it properly. By the end, you’ll know exactly how to transform your space without damaging a single wall.
Why Small Apartments Need Smart Space Division
Small apartments often follow open-concept designs. While visually appealing, this layout creates functional challenges:
- Lack of privacy
- Visual clutter
- Noise distractions
- Poor workflow for remote work
- Difficulty separating rest and productivity zones
When your brain cannot visually distinguish between areas, it becomes harder to relax or focus. Creating subtle boundaries improves both comfort and efficiency.
A lightweight wood room divider provides:
- Visual separation without full enclosure
- Better organization
- Improved room flow
- Enhanced aesthetics
- Zero wall damage
Instead of building walls, you introduce structure.
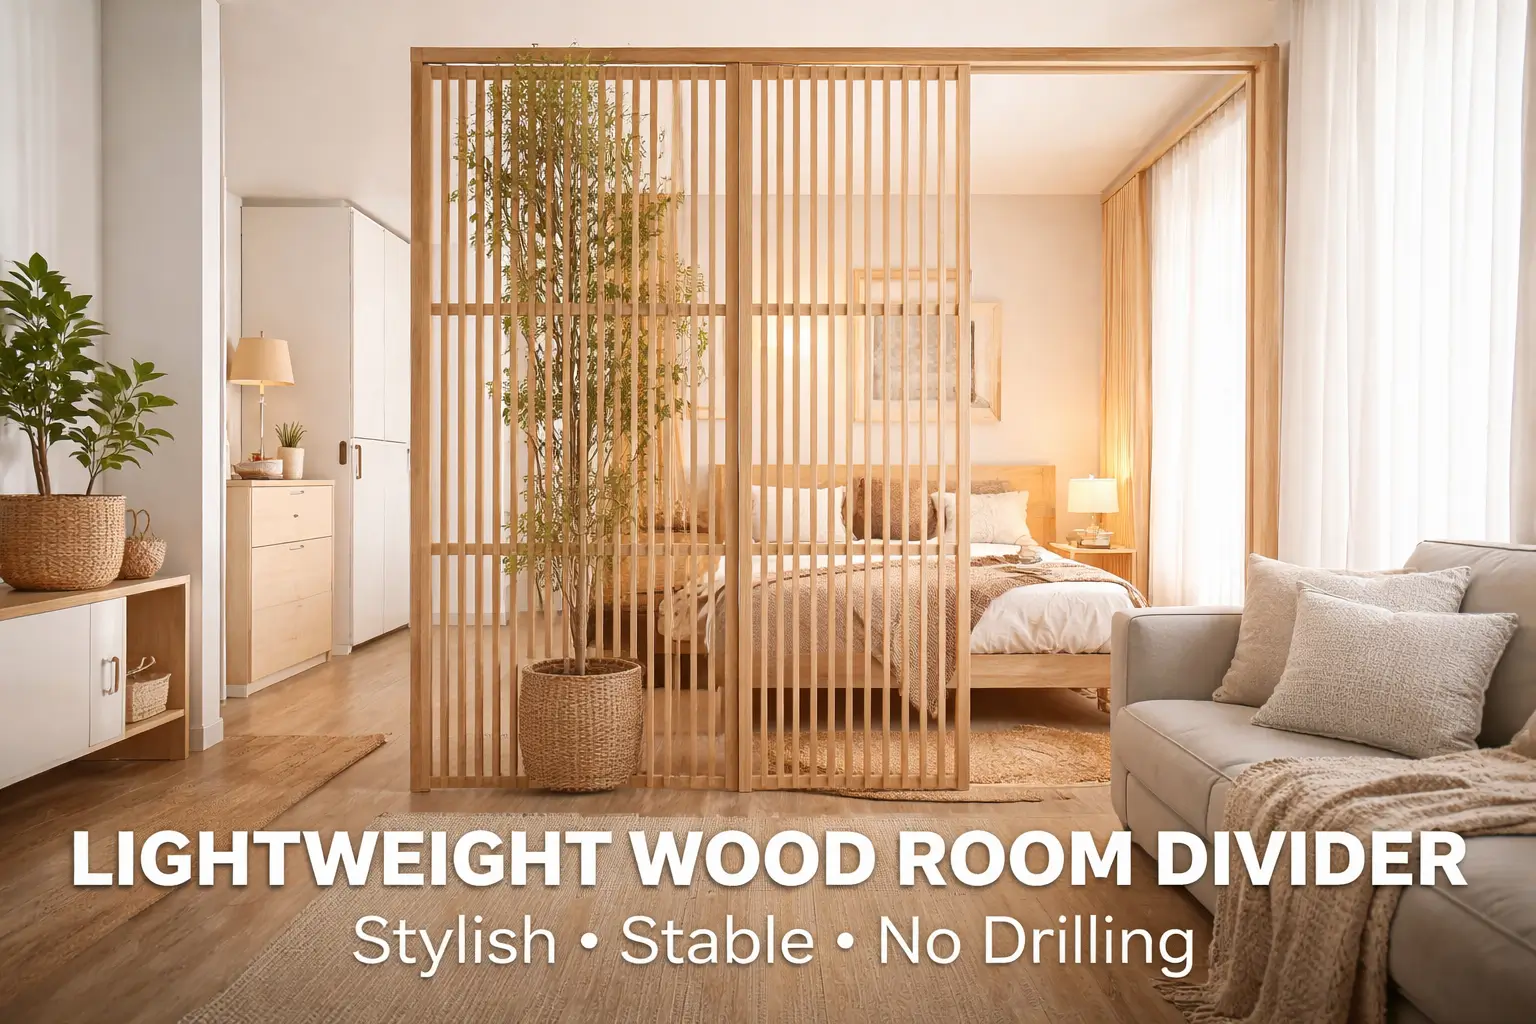
What Is a Lightweight Wood Room Divider?
A lightweight wood room divider is a freestanding partition made from solid or engineered wood that requires no drilling or wall anchoring. It stands independently and can be repositioned at any time.
Most models fall into these categories:
- Folding panel screens
- Slatted vertical dividers
- Frame-style open partitions
- Shelf-based dividers with storage
The key advantage is flexibility. You are not committing to a permanent layout. You are simply redefining space when needed.
Step-by-Step: How to Choose the Right Divider for Your Apartment
Choosing the wrong divider can make your apartment feel smaller or unstable. Follow this detailed step-by-step process.
Measure Your Space Properly
Before browsing options, measure:
- Width of the area you want to divide
- Ceiling height
- Distance between furniture
- Walking clearance (minimum 24 inches recommended)
Tip: Use painter’s tape on the floor to simulate the divider’s footprint. This gives you a realistic sense of scale.
Define Your Purpose Clearly
Ask yourself:
- Are you creating a bedroom separation?
- Do you need a home office zone?
- Is privacy or aesthetics your priority?
- Do you need extra storage?
If you need partial separation and airflow, choose slatted wood.
If you need stronger visual privacy, choose folding panel screens.
If you need storage, choose shelf-style dividers.
Evaluate Stability and Weight
Lightweight does not mean fragile.
Look for:
- Wide base support
- Strong hinge systems (if foldable)
- Anti-slip feet
- Solid joinery
Avoid overly thin or extremely narrow models, especially if you have pets or children.
Choose the Right Height
For small apartments, ideal height ranges from:
- 5 to 6 feet for visual separation
- 6 to 7 feet for stronger privacy
Very tall dividers can overwhelm low ceilings.
Match Your Interior Style
Wood finishes dramatically affect perception.
- Light oak or birch → makes space feel bigger
- White painted wood → clean and modern
- Walnut or dark tones → sophisticated but visually heavier
- Natural unfinished wood → minimalist and Scandinavian
Always coordinate with existing furniture.
Types of Lightweight Wood Room Dividers Explained
Folding Panel Screens
These are classic and adaptable. Hinged panels allow flexible positioning.
Best for:
- Studio apartments
- Temporary guest areas
- Quick reconfiguration
Advantages:
- Easy to store
- Adjustable angles
- Portable
Disadvantages:
- May be less stable if extremely lightweight
Slatted Wood Dividers
Vertical slats create partial privacy while maintaining airflow and light.
Best for:
- Modern apartments
- Minimalist interiors
- Maintaining brightness
Advantages:
- Stylish
- Airy
- Architectural appearance
Freestanding Frame Dividers
These feature thin wooden frames, sometimes combined with fabric or open patterns.
Best for:
- Scandinavian design
- Neutral interiors
They create subtle separation without blocking light.
Shelf-Based Dividers
Combines open shelving with partition function.
Best for:
- Home offices
- Small apartments needing storage
Advantages:
- Dual function
- Decorative display opportunity
- Practical and space-saving
Step-by-Step: How to Install a No-Drilling Divider Properly
Even without drilling, placement matters.
Clear the Area
Remove unnecessary furniture and clutter. A divider works best in a clean visual environment.
Position the Base First
Ensure the base is flat and stable. Avoid placing it on uneven rugs unless properly supported.
Adjust Angle (If Folding Model)
Slight angles increase stability. Avoid fully straight alignment unless the base is wide.
Test Stability
Gently push the divider to ensure balance. Adjust positioning if needed.
Anchor with Furniture (Optional)
Placing a sofa, desk, or console table nearby adds subtle reinforcement without drilling.
Best Placement Ideas for Small Apartments
Strategic placement transforms your layout.
Separate Bedroom in a Studio
Place divider at the foot or side of your bed to create a sleeping zone.
Create a Home Office Nook
Position divider behind your desk to define workspace.
Define Entryway
Use divider near entrance to create a visual hallway effect.
Divide Living and Dining Areas
This improves flow and organization.
Styling Your Divider for a High-End Look
A divider should not look temporary. Style it intentionally.
Add Soft Lighting
LED strip lighting behind slats creates depth.
Incorporate Plants
Tall indoor plants soften wooden structures.
Maintain Balance
Keep both sides of the divider visually organized.
Avoid Overcrowding
Too much decoration defeats the purpose.
Maintenance Tips for Longevity
Wood requires minimal but consistent care.
- Dust weekly
- Avoid excessive moisture
- Use wood-safe cleaners
- Tighten hinges periodically
- Keep away from direct water exposure
Proper care extends lifespan significantly.
Common Mistakes to Avoid
- Choosing oversized dividers
- Ignoring walking space
- Buying based on aesthetics only
- Blocking natural light entirely
- Forgetting ceiling height proportion
Small apartments demand proportional thinking.
Why a Lightweight Wood Divider Is Ideal for Renters
Renters need reversible solutions. A no-drilling divider:
- Prevents lease violations
- Protects security deposits
- Allows relocation flexibility
- Moves easily to a new apartment
It is one of the few design upgrades that combines function, flexibility, and protection.
Conclusion
A lightweight wood room divider is more than a decorative accessory. It is a strategic solution for modern apartment living. It allows you to create privacy, structure, and organization without damaging your walls or sacrificing flexibility.
By measuring carefully, choosing the correct style, and placing it strategically, you can redefine your layout completely. Whether you need a quiet workspace, a defined bedroom area, or simply better flow, this simple addition can transform your apartment into a more functional and visually appealing home.
Frequently Asked Questions
1. Is a lightweight wood room divider safe for apartments with pets?
Yes, if you choose a stable base model and avoid extremely narrow designs.
2. Can I use a divider in very small studio apartments?
Yes, but choose light-colored and moderately sized models to avoid visual heaviness.
3. Does a divider block natural light completely?
Not necessarily. Slatted or open-frame designs allow light flow.
4. How long does a wood divider typically last?
With proper care, several years.
5. Can I repaint a wood room divider?
Yes, many models can be sanded and repainted for customization.