Living in a studio apartment offers flexibility and affordability, but it often lacks one crucial element: separation. When your bed, sofa, desk, and dining table share the same open layout, it can feel cluttered and chaotic. For renters in the United States, the challenge becomes even more complicated because most lease agreements prohibit drilling into walls, ceilings, or structural framing. That means no permanent partitions, no drywall additions, and no anchored framing systems.
Fortunately, light plywood room dividers offer a practical and renter-friendly alternative. They allow you to create functional zones without damaging walls or risking your security deposit. When properly designed and stabilized, these dividers can provide visual privacy, improve organization, and elevate your apartment’s overall layout — all without a single drill hole in the wall.
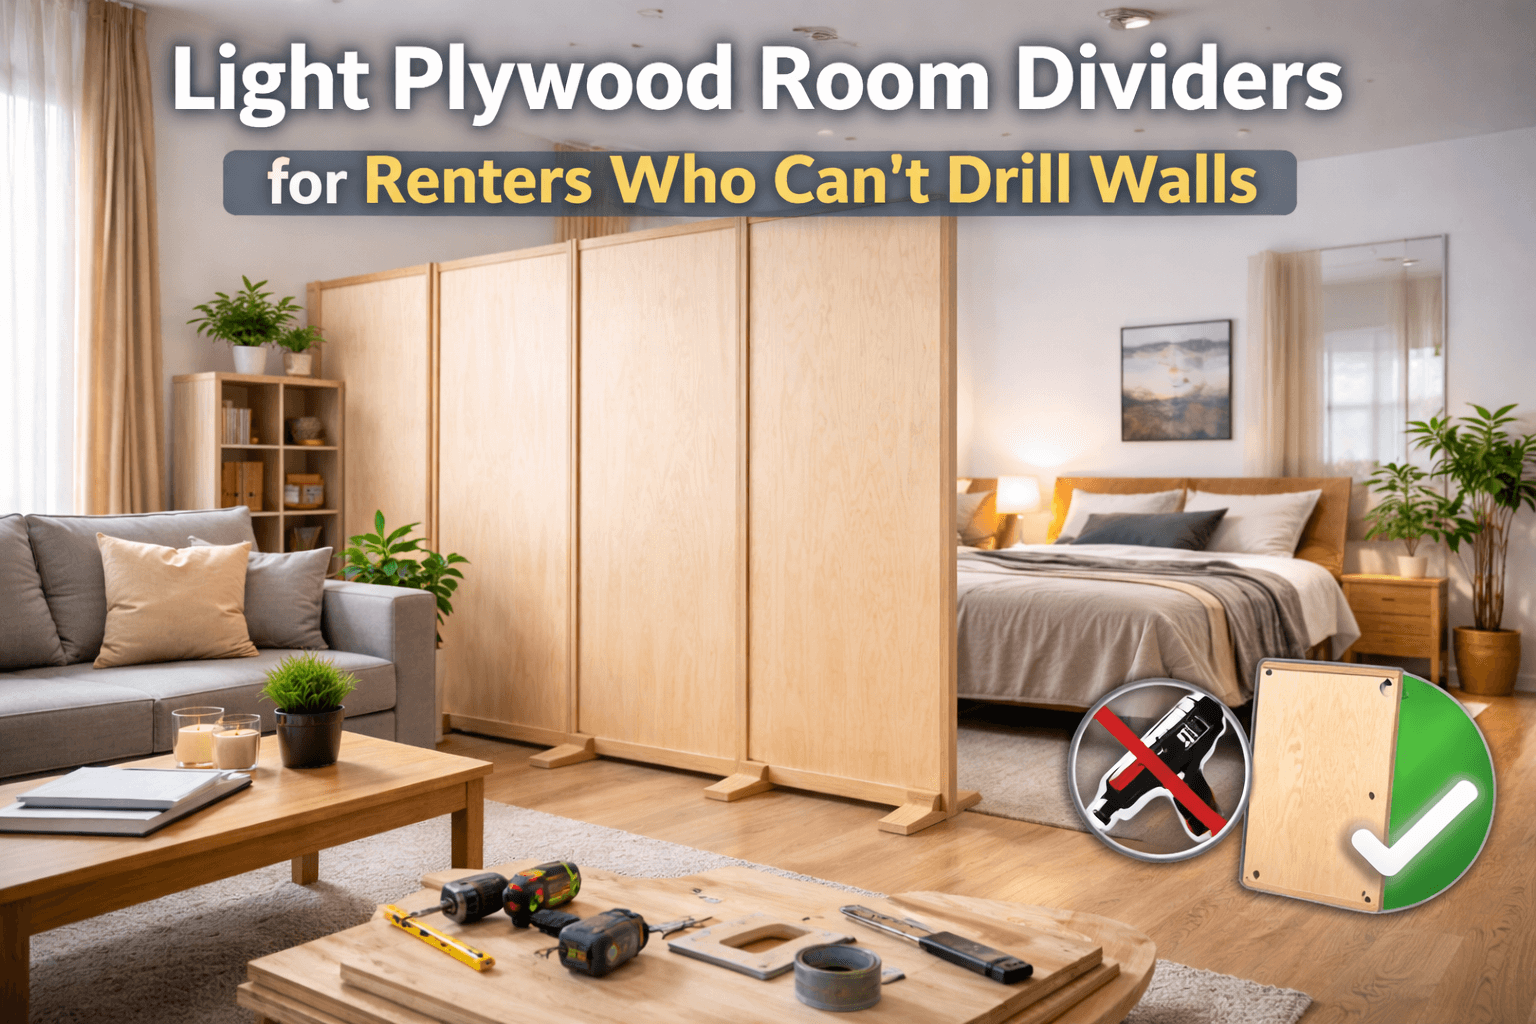
This comprehensive guide explains everything you need to know about using lightweight plywood as a no-drill room divider. You’ll learn the benefits, limitations, detailed step-by-step building instructions, safety considerations, budgeting insights, and design strategies to maximize your space efficiently.
Why Renters Often Can’t Drill Walls
Before diving into materials and construction, it’s important to understand why no-drill solutions are necessary.
Most U.S. lease agreements include restrictions such as:
- No structural alterations
- No permanent mounting systems
- No ceiling anchors
- No extensive wall modifications
- No large drilled holes requiring patching
Violating these rules can lead to:
- Loss of your security deposit
- Repair charges deducted upon move-out
- Additional landlord fees
- Potential lease termination
Even small screw holes may require patching, sanding, and repainting. In some buildings, especially high-rise apartments or newly renovated units, landlords enforce strict modification policies.
That’s why freestanding plywood dividers are so appealing. They stand independently and do not rely on wall anchoring.
Understanding Light Plywood as a Divider Material
Plywood is engineered wood made from thin layers (veneers) glued together with alternating grain directions. This cross-laminated construction increases structural stability while keeping weight manageable.
For apartment dividers, “light plywood” typically refers to:
- ¼ inch (6mm) thickness for lightweight applications
- ½ inch (12mm) thickness for added rigidity
- Softwood plywood such as pine or spruce
- Sanded plywood for smoother finishing
Key properties include:
- Moderate rigidity
- Easy cutting and shaping
- Affordable pricing
- Customizable surface
- Better strength-to-weight ratio than MDF
Compared to solid wood panels, plywood is lighter and less prone to splitting. Compared to MDF, it handles moisture better and weighs less.
Advantages of Light Plywood Room Dividers
1. Budget-Friendly for Renters
In the United States, plywood is widely available at hardware stores.
Typical price range:
- ¼-inch 4×8 sheet: $25–$45
- ½-inch 4×8 sheet: $40–$70
This makes it one of the most affordable room divider materials available.
2. Lightweight and Portable
A single person can carry a ¼-inch plywood panel. When framed properly, it remains manageable while providing sufficient structure.
Portability means:
- Easy relocation within the apartment
- Simple disassembly when moving out
- Reusability in future apartments
3. Easy to Customize
Plywood can be:
- Painted
- Stained
- Covered with wallpaper
- Wrapped in fabric
- Cut with decorative openings
You can tailor the look to match modern, minimalist, rustic, or industrial interiors.
4. Opaque Privacy
Unlike glass or polycarbonate, plywood provides full visual privacy. This makes it ideal for separating sleeping areas.
Limitations of Light Plywood Dividers
While practical, plywood does have limitations.
1. Minimal Soundproofing
Plywood blocks sight but not sound. It reduces echo slightly but does not provide acoustic insulation.
2. Stability Requires Proper Base Design
Because no wall anchoring is used, base support is critical. Poor stabilization can lead to tipping.
3. Moisture Sensitivity (Low-Grade Panels)
Cheap plywood may warp in humid conditions. Choose interior-grade plywood and seal it if necessary.
4. Fire Safety Awareness
Always ensure your divider does not block exits or violate fire safety guidelines in your building.
Step-by-Step Guide: Building a No-Drill Freestanding Plywood Divider
Below is a detailed process designed specifically for renters.
Step 1: Measure the Space Accurately
Use a measuring tape to record:
- Floor-to-ceiling height
- Desired divider width
- Distance from baseboards
- Floor leveling differences
Important tip:
Subtract ½ inch from total height to ensure easier positioning and slight clearance.
Step 2: Select Proper Thickness
For most studio apartments:
- ¼ inch plywood works for smaller panels
- ½ inch plywood is better for dividers over 6 feet wide
Avoid very thin decorative panels unless reinforced by a frame.
Step 3: Build a Lightweight Frame
Use:
- 1×2 or 1×3 pine boards
- Corner brackets
- Wood screws
Frame components:
- Two vertical side supports
- Top horizontal brace
- Bottom horizontal brace
- Optional middle reinforcement for wide spans
The frame adds rigidity and prevents bending.
Step 4: Attach the Plywood Panel to the Frame
Lay the frame flat on the floor.
- Position plywood panel on top
- Secure with screws every 12–16 inches
- Avoid overtightening to prevent cracking
Ensure edges align cleanly.
Step 5: Add Stabilizing Feet (Critical Step)
Without wall anchoring, base support is essential.
Install:
- Two perpendicular base feet (12–18 inches long)
- Rubber pads underneath
- Optional weighted plates for extra stability
For added strength, consider widening the base feet.
Step 6: Sand and Finish the Surface
Use:
- 120-grit sandpaper for smoothing
- 220-grit for finishing
Then apply:
- Primer
- Paint or stain
- Clear sealant if desired
Allow full drying time before positioning.
Step 7: Position and Stability Test
Place the divider in your desired location.
Test by:
- Gently pushing both sides
- Checking for wobbling
- Confirming flat contact with floor
If instability occurs:
- Increase base width
- Add weight at bottom
- Reinforce frame
Budget Breakdown for a Typical Studio Divider
Here’s a realistic estimate:
| Item | Estimated Cost |
|---|---|
| ½-inch Plywood Sheet | $50 |
| Frame Lumber | $60 |
| Screws & Brackets | $30 |
| Paint & Finish | $40 |
| Total Average | $180 |
This is significantly cheaper than modular glass systems or custom-built partitions.
Design Tips for Small Studio Apartments
To avoid making the space feel smaller:
- Paint divider white or light gray
- Use vertical cut-out designs
- Keep divider 6–12 inches below ceiling
- Align divider edges with furniture
Strategic placement improves flow. For example:
- Position divider behind sofa
- Separate bed from living zone
- Create a partial-height office nook
Avoid placing the divider directly in front of windows, as it may block natural light.
Safety and Placement Guidelines
For renter safety:
- Never block emergency exits
- Avoid placing near heaters or radiators
- Keep clear of door swing paths
- Use non-slip pads to protect hardwood floors
If you have pets or children, widen the base for extra stability.
Common Mistakes to Avoid
Many DIY renters rush installation. Avoid these errors:
- Incorrect height measurement
- Choosing plywood too thin
- Skipping frame reinforcement
- Ignoring floor unevenness
- Overcomplicating design
Simplicity and precision deliver better results.
When Light Plywood Is the Best Option
Plywood works best when:
- You need affordable separation
- Full visual privacy is desired
- DIY construction is preferred
- Temporary installation is required
It may not be ideal if you want:
- Soundproofing
- Transparent aesthetics
- High-end modern glass look
Final Thoughts
Light plywood room dividers provide renters who cannot drill walls with an affordable, flexible, and practical solution for creating functional zones in studio apartments. While they do not offer sound insulation or glass-like transparency, they excel in portability, customization, and ease of installation. With proper measurement, reinforcement, and base stabilization, plywood dividers can dramatically improve layout organization without violating lease agreements. For renters seeking privacy without permanent construction, this material offers one of the most accessible and adaptable solutions available.
Frequently Asked Questions
1. Can I install plywood dividers without drilling at all?
Yes, freestanding systems require no wall drilling.
2. Is ¼-inch plywood strong enough?
Yes, when properly framed.
3. Will it damage hardwood floors?
Not if rubber pads are used.
4. Can I repaint it later?
Yes, plywood is easy to repaint or refinish.
5. Is it easy to move to a new apartment?
Yes, especially if built with screws for disassembly.