Living in a rental property often means balancing comfort with restrictions. Many tenants want to divide spaces for privacy, work, or organization, but drilling into walls or installing permanent structures is rarely allowed. A lightweight interlocking room divider offers a practical solution that respects lease agreements while improving how a space functions.
Unlike fixed partitions, interlocking dividers rely on smart design rather than anchors. They are built to stand on their own, connect securely, and remain easy to remove or reconfigure. This makes them especially appealing for renters who value flexibility and want solutions that can move with them.
If you are looking for a way to customize your rental without damage or long-term commitment, learning how to build a lightweight interlocking room divider can be a rewarding project. The guide below explains the process clearly, helping you plan, build, and adapt a divider that fits rental living.
What Is a Lightweight Interlocking Room Divider?
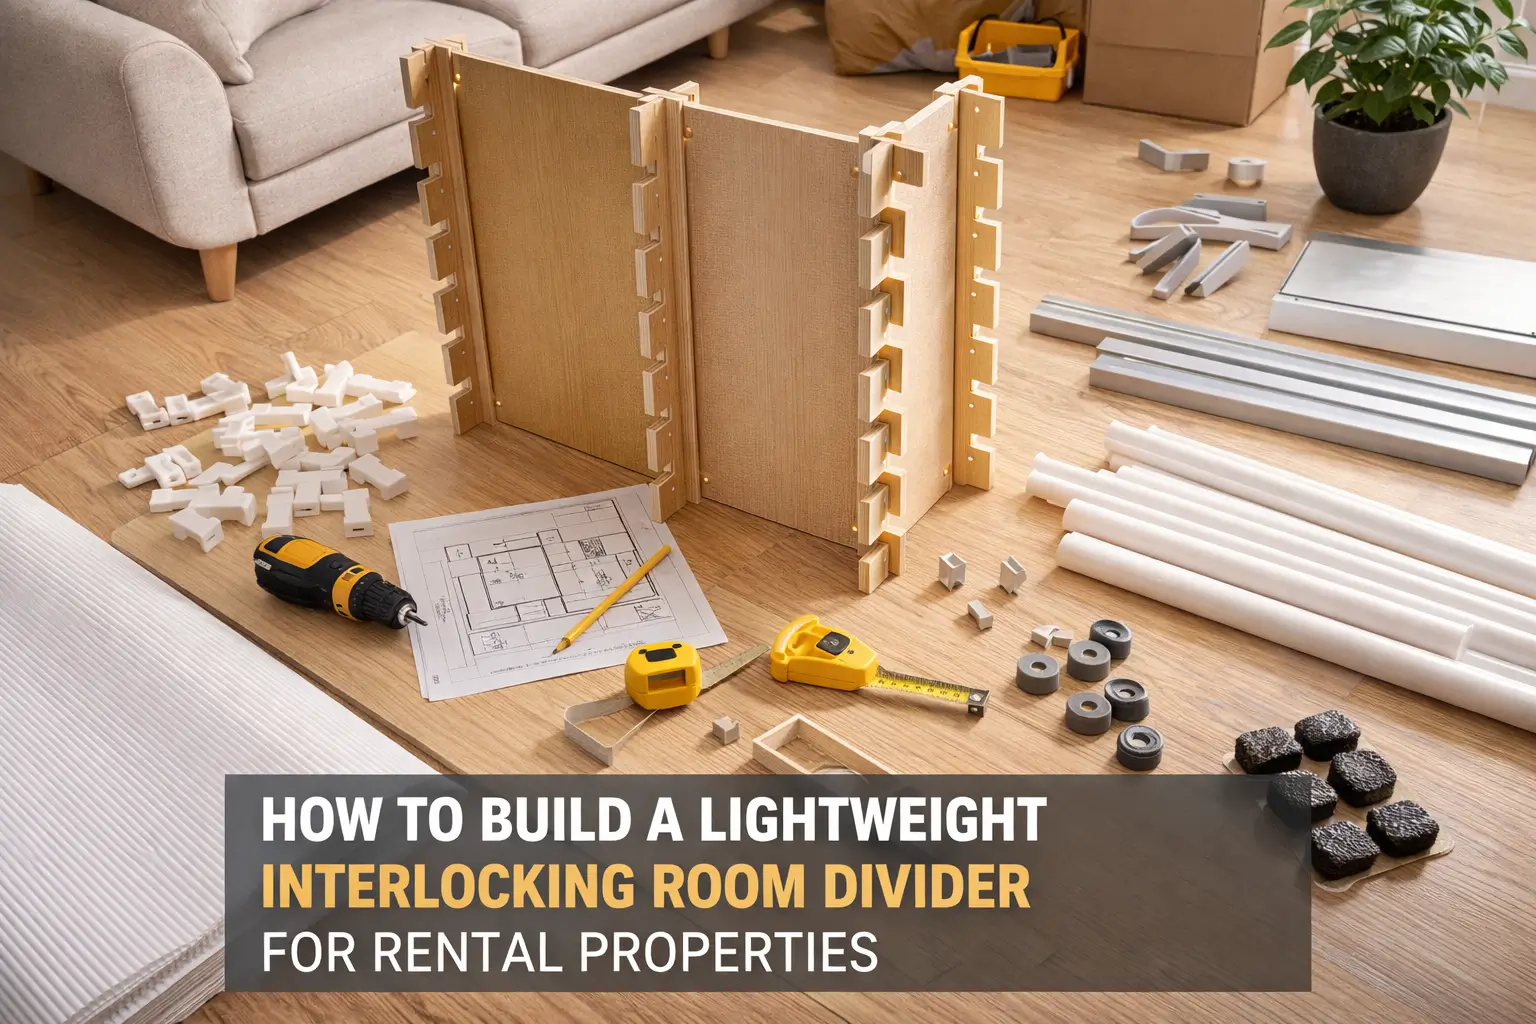
A lightweight interlocking room divider is a freestanding partition made of multiple panels that connect using slots, tabs, clips, or similar mechanisms. These connections allow panels to lock together securely without screws, nails, or wall anchors.
The “lightweight” aspect refers both to materials and overall structure. Instead of heavy wood or metal frames, these dividers use thinner panels, composite materials, or hollow frames that reduce weight while maintaining stability.
Because the system is modular, panels can be added, removed, or rearranged. This flexibility is key for rental properties, where layouts and needs often change.
Why Interlocking Systems Work for Rental Properties
Interlocking systems are particularly well suited to rentals because they avoid permanent alterations. Most rental agreements prohibit drilling or mounting fixtures, and even small holes can result in repair costs.
An interlocking divider stands independently. Its strength comes from the way panels connect and distribute weight, not from attachment to walls or ceilings. This design keeps surfaces intact and protects security deposits.
Another advantage is portability. When it is time to move, the divider can be disassembled and taken to a new space, making it a long-term investment rather than a temporary fix.
Planning Before You Build
Before purchasing materials or cutting panels, planning is essential. Start by identifying the purpose of the divider. Is it meant to create privacy, block light, reduce noise, or simply define zones?
Next, evaluate the available space. Measure width, height, and clearance for walking paths or furniture. Consider how the divider will be positioned—straight, angled, or folded into a partial enclosure.
Finally, think about how often you might want to move or reconfigure the divider. This will influence material choice and the type of interlocking mechanism you use.
Choosing Lightweight Materials
Material selection plays a major role in both performance and ease of use. Lightweight materials reduce the risk of tipping and make assembly simpler.
Common panel options include thin plywood, MDF, corrugated plastic panels, polycarbonate sheets, or fabric stretched over lightweight frames. Each offers different levels of privacy and light transmission.
For frames or edges, materials such as PVC pipes, aluminum channels, or slim wooden battens work well. The goal is to maintain rigidity without adding unnecessary weight.
Understanding Interlocking Mechanisms
Interlocking mechanisms replace screws and fasteners. The most common options include slot-and-tab joints, clip systems, and overlapping grooves.
Slot-and-tab systems use precisely cut openings that allow panels to slide into each other. Clip systems rely on removable connectors that snap panels together. Overlapping grooves create friction-based stability.
When choosing a mechanism, prioritize ease of assembly and disassembly. Renters benefit most from systems that can be adjusted without specialized tools.
Tools and Supplies Needed
One advantage of this project is that it requires only basic tools. Most renters already have access to what is needed.
Typical tools include a measuring tape, pencil, level, utility knife or handsaw, and sandpaper. Depending on materials, a drill may be used only for panel preparation, not installation.
Supplies include panels, connectors or clips, non-slip floor pads, and optional weights for the base. Keeping the tool list simple makes the project more accessible.
Step-by-Step: Building the Interlocking Divider
Begin by cutting panels to the desired height and width. Ensure all panels are uniform to maintain balance.
Next, prepare the interlocking joints. Cut slots or attach clips according to your chosen system. Test connections before full assembly to ensure a snug fit.
Assemble the panels gradually, starting from one end and working across. Keep the divider upright and adjust angles as you go. This step-by-step approach prevents misalignment and improves stability.
Assembly Without Drilling
The divider should stand securely without relying on walls. Stability comes from panel angles, base width, and weight distribution.
Arranging panels in a slight zigzag increases resistance to tipping. Adding non-slip pads under the base helps prevent movement on smooth floors.
If additional stability is needed, low-profile weighted bases can be integrated discreetly without damaging surfaces.
Adapting the Divider to Different Layouts
In studio apartments, the divider can separate sleeping and living areas. Angling panels preserves openness while defining zones.
In bedrooms, it can create dressing areas or workspace separation. For home offices, it helps establish visual boundaries that improve focus.
Because the system is modular, adapting it to different rooms requires only reconfiguration, not rebuilding.
Ensuring Stability and Safety
Safety should always be a priority. Test the divider by gently applying pressure from different angles. It should feel firm and balanced.
Avoid placing the divider in high-traffic areas where it could be bumped frequently. Ensure it does not block exits or ventilation.
For households with pets or children, additional base weight or wider panel angles improve safety.
Design and Visual Integration
A divider should complement the space, not overpower it. Light colors and translucent materials help maintain brightness.
Matching the divider’s style to existing furniture creates visual harmony. Open designs allow airflow and prevent the space from feeling closed off.
Thoughtful design choices make the divider feel intentional rather than temporary.
Maintenance and Reconfiguration
Maintenance is minimal. Regular dusting and occasional inspection of joints keep the divider in good condition.
One of the main benefits of an interlocking system is reusability. Panels can be rearranged, resized, or repurposed as needs change.
This adaptability extends the life of the divider and adds long-term value.
Cost Breakdown and Budget Tips
Costs depend on materials and size, but lightweight dividers are generally affordable. Basic builds can be completed with modest budgets.
Using standardized panel sizes reduces waste. Recycled or repurposed materials can further lower costs.
For renters, investing slightly more in durable connectors often pays off in longevity and ease of reuse.
Common Mistakes to Avoid
A frequent mistake is choosing materials that are too heavy, compromising portability and safety. Another is underestimating space requirements.
Poorly aligned joints can reduce stability. Always test connections before final assembly.
Rushing the planning phase often leads to unnecessary adjustments later.
Conclusion
Building a lightweight interlocking room divider for rental properties allows tenants to customize their living space without violating lease terms or damaging surfaces. By choosing appropriate materials, using smart interlocking mechanisms, and focusing on stability through design, renters can create flexible, reusable partitions that adapt to changing needs. With careful planning and thoughtful construction, an interlocking divider becomes a practical solution tailored to rental living.
Frequently Asked Questions
1. Can an interlocking divider be used in small apartments?
Yes, modular panels adapt well to limited space when angled properly.
2. Does this type of divider damage floors or walls?
No, it is designed to be freestanding and surface-safe.
3. How heavy should the panels be?
Light enough to move easily, but rigid enough to stand upright when connected.
4. Can the divider be reused after moving?
Yes, reusability is one of its main advantages.
5. Is professional help needed to build it?
No, the project is suitable for beginners with basic tools.