No-drill room dividers have become a popular solution for renters who want to divide spaces without permanently altering their homes. They promise flexibility, easy installation, and peace of mind—especially for those who must return a property in its original condition. However, the idea that “no drilling” automatically means “no damage” can be misleading.
Many renters are surprised to discover marks, cracks, or structural stress only after removing a divider. These issues are often hidden during daily use and only become visible when it’s time to move out. In some cases, the damage can lead to disputes with landlords or unexpected repair costs.
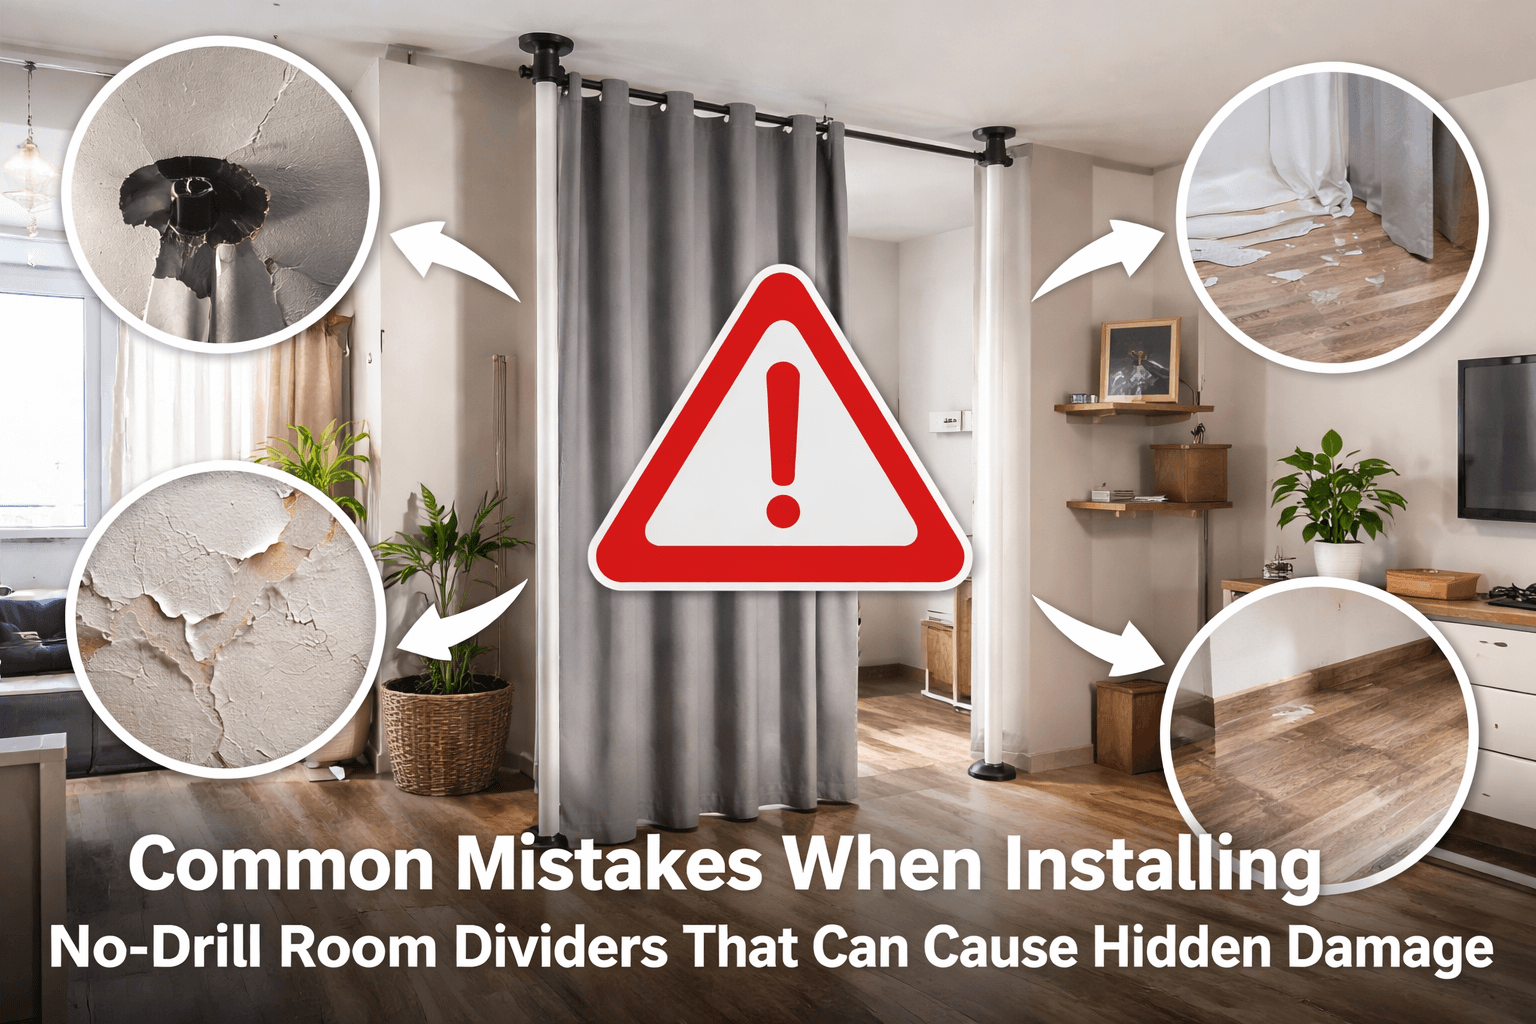
Understanding the most common mistakes when installing no-drill room dividers is essential to avoid these problems. By knowing what to watch for and how to install dividers correctly, you can protect both your space and your security deposit while still enjoying a flexible layout that suits your lifestyle.
What Are No-Drill Room Dividers?
No-drill room dividers are temporary partition systems designed to separate spaces without the need for screws, nails, or permanent fixtures. They are especially appealing to renters because they allow customization without violating lease agreements.
Common types include tension-mounted dividers, freestanding panels, pressure-fit poles with curtains, and modular divider systems. These options rely on weight distribution, friction, or tension rather than wall penetration.
While these systems are marketed as renter-friendly, they still interact directly with walls, floors, and ceilings. If installed incorrectly, they can exert pressure in ways that cause subtle but serious damage over time.
Why “No-Drill” Doesn’t Mean “No Risk”
The term “no-drill” refers only to the absence of holes. It does not mean the absence of force, pressure, or friction. Most no-drill dividers rely on compression between surfaces, which can stress drywall, plaster, paint, and even ceiling joints.
Hidden damage often develops gradually. Small pressure points can weaken materials, leading to cracks, dents, or misalignment. Because these issues are not immediately visible, renters may assume everything is fine—until the divider is removed.
Recognizing this distinction is the first step toward preventing costly mistakes.
Mistake #1: Applying Excessive Pressure to Walls or Ceilings
One of the most common mistakes is overtightening tension-based dividers. Many users believe that tighter means safer, but excessive pressure can compress drywall or damage ceiling surfaces.
Over time, this pressure may cause hairline cracks, ceiling bowing, or paint separation. These issues often remain hidden behind the divider and only become apparent later.
The correct approach is to apply only the minimum pressure required for stability, checking manufacturer guidelines carefully.
Mistake #2: Ignoring Weight Limits
Every no-drill room divider has a maximum load capacity. Ignoring this limit—especially when adding shelves, plants, or heavy curtains—can lead to structural stress.
When weight exceeds safe limits, pressure is redistributed unevenly, increasing the risk of surface damage. This can also make the divider unstable, posing a safety risk.
Always factor in not just the divider itself, but anything attached to it.
Mistake #3: Installing on Unsuitable Surfaces
Not all walls, ceilings, or floors are designed to handle compression-based systems. Textured ceilings, old plaster walls, or uneven flooring can react poorly to pressure.
Installing a divider on these surfaces can lead to cracks, chipped paint, or surface deformation. In rental properties, these materials are often older and more fragile than expected.
Before installation, assess the surface type and condition to ensure compatibility.
Mistake #4: Poor Measurement and Uneven Load Distribution
Incorrect measurements can cause dividers to sit at an angle or distribute weight unevenly. This creates localized pressure points that increase the likelihood of damage.
Even a small misalignment can lead to long-term issues, especially with tall dividers that span from floor to ceiling.
Accurate measuring and leveling are essential steps that should never be rushed.
Mistake #5: Using Low-Quality Tension Mechanisms
Budget-friendly dividers often come with weak or poorly engineered tension systems. These components may loosen over time, causing the divider to shift and scrape surfaces.
As the divider moves, it can damage paint, dent drywall, or leave friction marks. Re-tightening repeatedly only increases pressure-related risks.
Investing in quality hardware significantly reduces these problems.
Mistake #6: Skipping Surface Protection
Many renters install dividers directly against walls or ceilings without protective padding. This increases friction and concentrates pressure on small contact points.
Protective pads or rubberized ends help distribute force more evenly and reduce surface wear. Skipping this step is a common oversight that leads to visible damage later.
Simple protective measures can make a substantial difference.
Mistake #7: Frequent Repositioning Without Inspection
Repositioning a no-drill divider may seem harmless, but repeated adjustments can weaken surfaces. Each move introduces new pressure points and friction.
Without regular inspection, small issues can accumulate into noticeable damage. Renters often underestimate the impact of frequent changes.
If repositioning is necessary, inspect all contact areas carefully each time.
How to Install No-Drill Room Dividers Safely
Safe installation begins with careful planning. Measure the space accurately, confirm surface compatibility, and review manufacturer instructions in detail.
Apply tension gradually, checking alignment and stability at each step. Use protective pads where the divider contacts surfaces, and avoid adding unnecessary weight.
Taking a methodical approach reduces the risk of hidden damage significantly.
How to Detect Hidden Damage Early
Early detection can prevent minor issues from becoming major problems. Look for signs such as hairline cracks, peeling paint, or slight ceiling deformation.
Periodically remove or loosen the divider to inspect contact points. Catching problems early allows for quick adjustments before damage worsens.
Routine checks are especially important in long-term installations.
Best Practices for Renters
Renters should document the condition of walls and ceilings before installation. Taking photos provides a reference point if questions arise later.
Follow manufacturer guidelines strictly, avoid overloading dividers, and inspect surfaces regularly. When in doubt, choose freestanding options that minimize surface contact.
These best practices help protect both your living space and your rental agreement.
Conclusion
No-drill room dividers offer flexibility and convenience, but they are not entirely risk-free. Many of the most serious issues arise from simple installation mistakes that are easy to overlook.
By understanding how pressure, weight, and surface compatibility interact, renters can avoid hidden damage and unexpected repair costs. Thoughtful installation and regular inspection make all the difference.
With the right approach, no-drill room dividers can remain a practical, renter-friendly solution without compromising the condition of your home.
Frequently Asked Questions (FAQs)
1. Can no-drill room dividers really damage walls or ceilings?
Yes. While they don’t require holes, they rely on pressure and friction, which can cause hidden damage if misused.
2. Are tension-mounted dividers safe for long-term use?
They can be safe if installed correctly, monitored regularly, and used within recommended limits.
3. What surfaces are most at risk of hidden damage?
Drywall, plaster, textured ceilings, and older painted surfaces are especially vulnerable.
4. How often should I inspect my room divider installation?
Ideally every few months, or immediately after repositioning the divider.
5. Are freestanding dividers safer for renters?
In many cases, yes. Freestanding options reduce direct pressure on walls and ceilings, lowering the risk of damage.