Living in a rental apartment in the United States often means adapting to limited square footage. Studio apartments and compact one-bedroom units are common, especially in cities where rent prices are high. In many cases, a single open area must serve as a bedroom, living room, dining space, and home office.
The problem becomes clear quickly: you need separation, but you cannot modify the structure. Most leases prohibit drilling into ceilings, installing permanent walls, or making structural changes. Even minor damage can result in losing part of your security deposit.
This is where the ceiling pressure room divider gains attention. It promises a simple solution: divide your space without tools, without holes, and without permanent alterations. But is it really secure? Or is it just another rental shortcut that may cause problems later?
Let’s explore this in detail.
What Is a Ceiling Pressure Room Divider and How Does It Work?
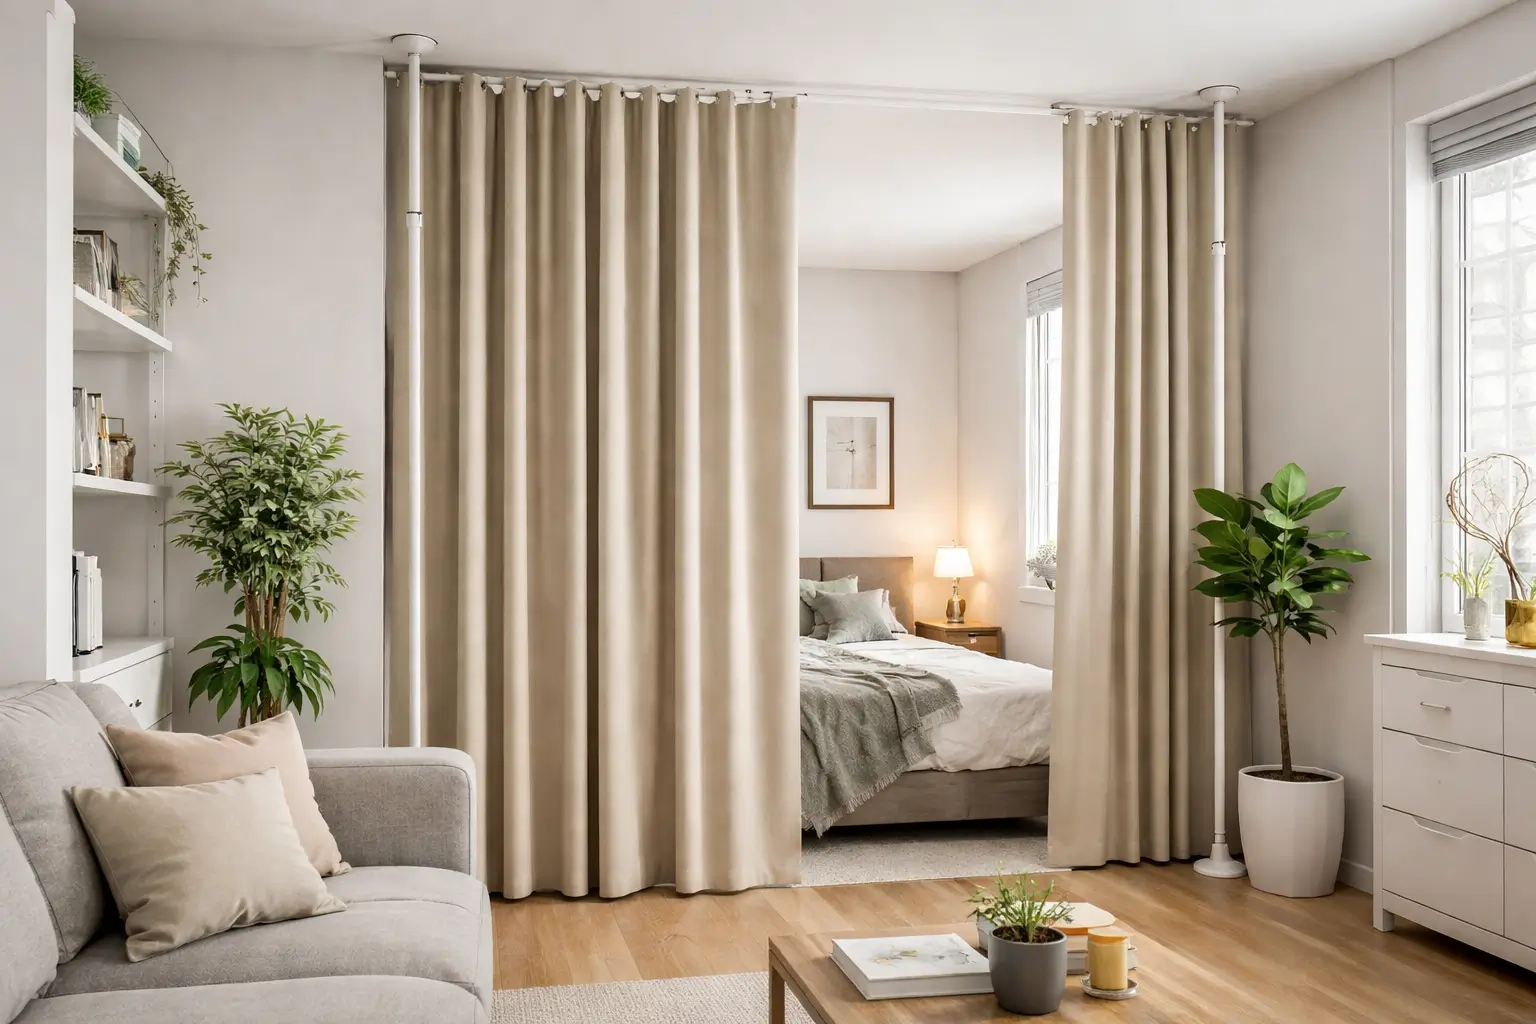
A ceiling pressure room divider is a temporary partition system that uses vertical tension poles to create separation between spaces. Instead of screws or anchors, it relies on compression force between the floor and ceiling to stay upright.
The system typically includes:
- Adjustable metal poles (usually aluminum or steel)
- Rubber or silicone end caps to prevent slipping
- A curtain, fabric panel, or lightweight board
The core principle is tension. When properly adjusted, the poles press firmly between the floor and ceiling, generating enough friction to hold the structure in place.
This mechanism is similar to how a tension shower rod works, but on a larger and vertical scale.
However, the effectiveness of this system depends on three critical factors:
- Proper measurement
- Correct installation
- Suitable ceiling and floor materials
Without these, stability can be compromised.
Why Renters Are Turning to This Solution
There are practical reasons why ceiling pressure room dividers are becoming more popular among renters.
They Avoid Permanent Damage
Because they don’t require drilling or anchors, they reduce the risk of violating lease agreements.
They Are Relatively Affordable
Compared to building a temporary wall, which can cost between $800 and $2,000, most ceiling pressure systems range from $80 to $300.
They Are Portable
When you move, you can disassemble the system and take it with you.
They Provide Visual Privacy
Even a simple curtain can transform an open studio into what feels like a one-bedroom apartment.
Despite these advantages, security remains the main concern.
Is a Ceiling Pressure Room Divider Actually Secure?
The answer depends on realistic expectations and proper installation.
It is secure enough for:
- Visual separation
- Light fabric panels
- Temporary zoning of space
It is not secure enough for:
- Supporting shelves
- Mounting heavy objects
- Handling strong pushing force
The stability of the divider relies entirely on balanced pressure. Too little tension causes slipping. Too much tension may damage the ceiling.
Understanding the Risks Before You Install
Before deciding, it’s important to understand potential issues.
1. Drywall Damage
Most U.S. apartment ceilings are drywall. Excessive pressure can leave dents or small cracks. While not always visible immediately, damage may appear after removal.
2. Slippage on Smooth Floors
Highly polished wood, laminate, or tile flooring can reduce friction. If the rubber base does not grip properly, the divider may shift.
3. Uneven Surfaces
Textured ceilings, popcorn ceilings, or slightly angled floors reduce stability.
4. Child or Pet Interference
If someone pulls, climbs, or leans heavily on the divider, it may collapse.
Knowing these risks allows you to minimize them.
Step-by-Step Guide: How to Install a Ceiling Pressure Room Divider Safely
If you choose this solution, installation quality will determine safety. Follow this detailed process:
Step 1: Measure Precisely
- Measure floor-to-ceiling height in multiple spots.
- Check for uneven areas.
- Confirm the divider’s adjustable range matches your ceiling height.
Even a half-inch miscalculation can affect stability.
Step 2: Inspect Ceiling and Floor Condition
- Identify drywall weaknesses or cracks.
- Avoid areas near ceiling fixtures.
- Ensure the floor surface is clean and dry.
If the ceiling feels soft when lightly pressed, reconsider placement.
Step 3: Position the Poles
- Mark where each vertical pole will stand.
- Ensure equal spacing if installing multiple poles.
- Keep the divider straight using a level tool.
Misalignment increases collapse risk.
Step 4: Apply Gradual Tension
- Extend the pole slowly.
- Tighten until firm resistance is felt.
- Avoid overtightening.
A good rule: it should feel stable but not strained.
Step 5: Stability Test
Before attaching any fabric or panel:
- Gently push from different angles.
- Check for wobbling.
- Verify that the base does not slide.
If it shifts, readjust immediately.
Step 6: Attach Lightweight Materials Only
Choose materials such as:
- Thick curtains
- Sheer panels
- Lightweight wood boards
Avoid heavy glass or dense solid panels.
When a Ceiling Pressure Divider Is a Smart Choice
This solution works best in specific scenarios:
- Studio apartments needing bedroom separation
- Temporary home office setups
- Shared apartments where roommates need privacy
- Short-term rentals
It is especially useful when:
- You plan to move within a year
- You need flexible room configurations
- You want to avoid landlord disputes
In these cases, the benefits outweigh the risks.
When It’s Probably a Bad Idea
There are situations where this divider may not be suitable.
Avoid it if:
- You need real soundproofing
- You want a permanent structural change
- Your ceiling is fragile
- You have energetic pets or children
- You expect it to function like a real wall
It’s important to understand that this is a space divider, not construction.
Alternative Rental-Friendly Options
If you’re unsure, consider these alternatives:
Freestanding Bookshelves
They provide both storage and separation. However, they require floor space and may look bulky.
Folding Screens
Easy to move and completely reversible, but less stable.
Curtain Tracks Mounted to Walls
More stable than tension poles, but may require small wall anchors.
Modular Partition Systems
Some modern systems use weighted bases instead of ceiling pressure.
Each option has trade-offs between stability, cost, and flexibility.
Cost vs. Long-Term Value
When analyzing cost, consider more than the purchase price.
A ceiling pressure room divider typically costs:
- $80–$150 for basic models
- $150–$300 for premium systems
But think about:
- Potential ceiling repairs
- Replacement costs if it fails
- How long you plan to use it
If it prevents you from moving to a more expensive apartment, it may offer strong value.
Final Verdict: Secure Solution or Risky Shortcut?
A ceiling pressure room divider is neither inherently unsafe nor completely foolproof.
Its security depends on:
- Correct installation
- Realistic expectations
- Appropriate usage
For renters who need temporary visual separation without damaging walls, it can be a practical and budget-friendly solution.
However, if you expect structural strength, sound isolation, or heavy-duty support, you may be disappointed.
The key is understanding its limitations and installing it properly.
Conclusion
The ceiling pressure room divider represents a modern solution for a very common rental problem: how to divide space without violating your lease. When installed carefully and used within its intended purpose, it provides flexibility, portability, and privacy.
It is not a replacement for real walls. It is not a structural solution. But for visual separation in small apartments, it can be highly effective.
Before purchasing, evaluate your ceiling condition, your household environment, and your expectations. With proper planning and careful installation, it can transform your living space without risking your security deposit.
Frequently Asked Questions
1. Can a ceiling pressure room divider fall easily?
If poorly installed or overtightened incorrectly, yes. Proper measurement and gradual tension significantly reduce this risk.
2. Will it leave marks on the ceiling?
It can leave minor pressure marks, especially on drywall. Using protective pads helps minimize damage.
3. Is it safe for popcorn ceilings?
Popcorn ceilings reduce surface contact and may decrease stability. Extra caution is recommended.
4. Can I use it for soundproofing?
No. It primarily provides visual separation, not acoustic insulation.
5. Is landlord approval necessary?
Although non-permanent, checking your lease agreement or informing your landlord is always a smart precaution.