Living in a rental often means balancing comfort with restrictions. You may want to divide a room for privacy, create a home office, or separate sleeping and living areas—but drilling into walls, floors, or ceilings is usually not an option. That’s where pressure-mounted wooden room dividers come in.
A pressure-mounted divider allows you to create a solid, stylish partition using tension instead of screws or permanent fixtures. This approach protects your security deposit, keeps your landlord happy, and still gives you the flexibility to redesign your space as your needs change.
In this guide, you’ll learn exactly how to build a pressure-mounted wooden room divider without damaging floors or ceilings, using simple tools, accessible materials, and clear steps. Whether you’re new to DIY or just want a renter-safe solution, this walkthrough will help you confidently transform your space.
What is a pressure-mounted wooden room divider
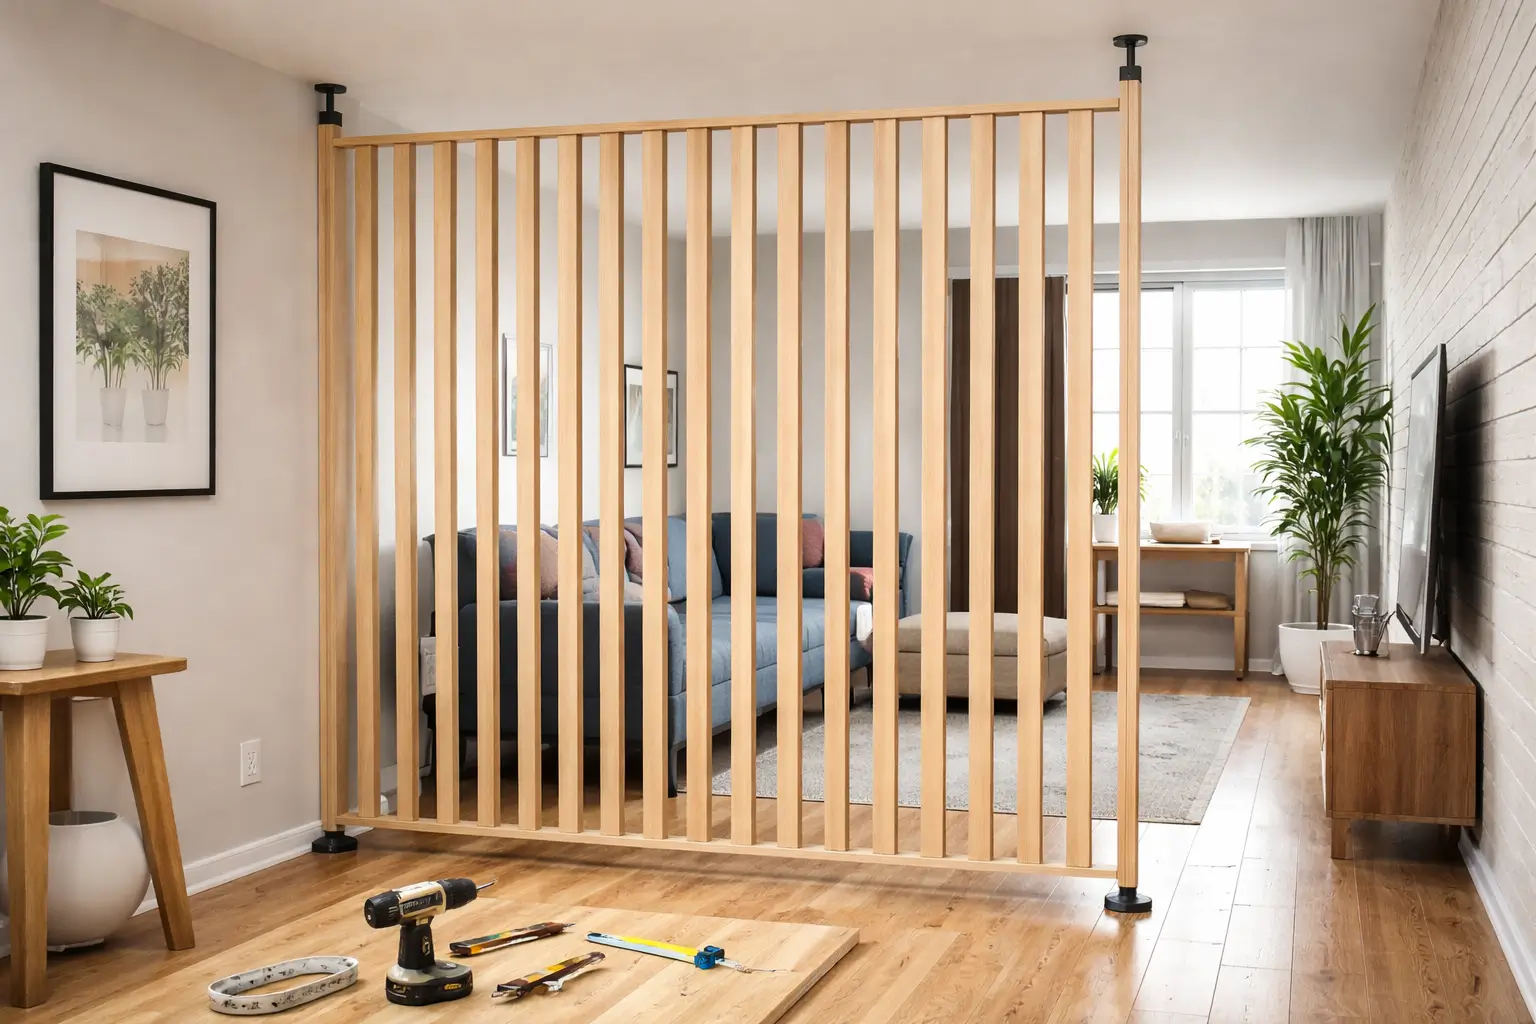
A pressure-mounted wooden room divider is a freestanding partition that stays in place by applying vertical or horizontal tension between the floor and ceiling. Instead of nails or anchors, it relies on adjustable components that create enough pressure to remain stable without causing damage.
Unlike temporary fabric dividers or folding screens, wooden dividers offer structure, durability, and better sound and visual separation. They can be minimalist slat walls, partial dividers, or full-height partitions depending on your design goals.
For renters, the key advantage is reversibility. When it’s time to move out, the divider can be removed without leaving holes, cracks, or marks behind.
Why pressure-mounted dividers are ideal for renters
Renters face unique limitations. Most leases prohibit drilling, screwing, or making structural changes. Even small holes can result in costly repairs or lost deposits.
Pressure-mounted dividers solve this problem by offering:
- Zero permanent damage
- Easy installation and removal
- Flexibility to relocate or redesign
- A more solid look than curtains or screens
They are especially useful in studio apartments, shared living spaces, and homes where rooms serve multiple purposes throughout the day.
How pressure-mounted systems work
At the core of any pressure-mounted divider is tension. Adjustable components—often threaded rods, telescoping poles, or compression feet—expand until they press firmly against the floor and ceiling.
Rubber or felt pads are placed at contact points to:
- Protect surfaces from scratches
- Increase friction
- Distribute pressure evenly
When installed correctly, the force is strong enough to hold the divider upright but gentle enough to avoid damage.
Tools and materials you will need
Before starting, gather all tools and materials. This avoids interruptions and ensures accurate assembly.
Basic tools
- Measuring tape
- Level
- Drill (for wood assembly only)
- Screwdriver or drill bits
- Saw (hand saw or circular saw)
Materials
- Wooden boards (pine or poplar recommended)
- Threaded rods or adjustable tension hardware
- Rubber furniture pads or neoprene pads
- Wood screws
- Wood glue (optional)
- Sandpaper
- Paint, stain, or sealant (optional)
Choosing the right wood and hardware
Softwoods like pine are ideal for beginners. They’re lightweight, affordable, and easy to cut. Hardwood looks great but adds unnecessary weight for a pressure-based system.
For hardware, threaded rods with adjustable nuts work exceptionally well. They allow precise tension control and are widely available at hardware stores.
Avoid overly heavy materials. The goal is stability through pressure, not mass.
Measuring your space correctly
Accurate measurements are critical. Measure floor-to-ceiling height in at least three different spots, as ceilings are often uneven.
Subtract about ½ inch from the smallest measurement. This gives room to insert the divider and then expand it upward using the pressure mechanism.
Double-check all measurements before cutting wood.
Step-by-step: building the wooden frame
Step 1: Cut the vertical supports
Cut your vertical boards to the adjusted height measurement.
Step 2: Create horizontal connectors
These will hold vertical slats together. Space them evenly depending on your design.
Step 3: Assemble the frame
Use wood screws and optional glue to connect everything securely. Check alignment with a level after each section.
Step-by-step: installing the pressure mechanism
Drill holes at the top and bottom of the vertical supports to insert threaded rods.
Attach rubber pads at both contact ends. Slowly tighten the rods until the divider feels firm but not forced.
Never overtighten. Excessive pressure can damage drywall or ceiling texture.
How to install the divider safely
Position the divider upright and expand it gradually. Use a level to ensure it stays straight.
Test stability by gently pushing from different angles. If it shifts, slightly increase tension until secure.
Once stable, step back and visually inspect alignment and spacing.
Stability, safety, and weight considerations
A properly installed pressure-mounted divider should not wobble. If it does:
- Reduce panel weight
- Add horizontal bracing
- Improve rubber padding grip
Avoid hanging heavy objects like shelves or TVs unless the structure is reinforced and designed for load-bearing.
Common mistakes to avoid
- Measuring only once
- Overtightening the pressure rods
- Using slippery pads
- Choosing overly heavy wood
- Ignoring ceiling unevenness
Avoiding these mistakes ensures both safety and longevity.
Design ideas and customization options
You can personalize your divider with:
- Vertical slats for airflow and light
- Painted finishes to match décor
- Partial-height designs
- Built-in planters or hooks (lightweight)
Maintenance and easy removal
Dust regularly and check tension every few months. When removing, slowly loosen pressure—never force it down.
Store components flat to reuse in your next home.
Final thoughts
Building a pressure-mounted wooden room divider without damaging floors or ceilings is one of the smartest DIY solutions for renters. It offers privacy, flexibility, and style—without breaking lease rules or budgets. With careful planning and proper installation, you can reshape your space confidently and reversibly.
Frequently Asked Questions (FAQ)
1. Can a pressure-mounted divider really stay secure without screws?
Yes, when installed correctly with proper tension and padding.
2. Will this damage popcorn ceilings or laminate floors?
No, as long as rubber pads are used and pressure is applied gradually.
3. Is this safe in apartments with drywall ceilings?
Yes, but avoid overtightening and distribute pressure evenly.
4. Can I remove it without leaving marks?
Absolutely. That’s one of its main advantages.
5. How long does it take to build and install?
Most projects can be completed in one afternoon.